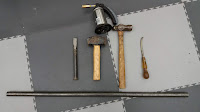
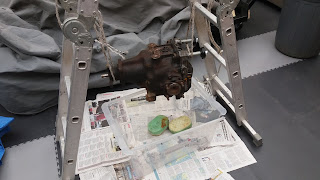
My rear hub carrier strip down kit.
It turns out none of this is actually required. What you really need instead is a Peter.
The Peter I used has sadly (for us, not for him) packed up and is moving back to Oz.
So you need a generic media blasting company that also has a hot bath.
The procedure is:
Remove the bearings, the parking brake shoes and dust guard.
Take the hub carriers that look like this;
to your local media blasting company
So hot in fact all the bearing races fall out.
Next they will vapour blast them with some kind of media in water.
When ready, bung them some beer vouchers and collect your carriers that will look just like this:
Make sure to give them a good wash in case any of the media dust is still present.
In fact this procedure is the same for all the rusty, corroded donor bits. So forget about degreasing, scrubbing, rust removers, wire brushes.
Mind you, they don't do broken stud removal. I had to drill and tap two dust guard fixing screws.
These carriers will not even need painting. But what you should do is spray them with ACF50 but don't get it on the bearing seats.
Fitting the races.
Heat the oven to 150 degrees (fan oven 140) or gas mark 2 and cook for 30 minutes.
Remove from oven and if the races don't just drop in, they will need just a few taps with a bearing drift. Set aside to cool.
As per the AK manual grease and fit the bearings and seals.
The manual doesn't mention about checking the hub play. When the hub nut is tightened there should be around 0.002" play in the hub. You won't feel that small movement so we need a DTI gauge.
I used an old hub nut to temporarily assemble the carrier. These are supposed to be used just the once and at 20 quid each I wasn't going to use a new one. Tighten the nut as tight as possible with a crack bar, it needs to be very tight, the torque setting when finally assembled will be 220 lb/ft
Hold the assembled hub in a vice, set up the DTI and make sure the carrier is pushed down on the hub. Using two screwdrivers on opposite sides, lever the carrier up. You should see just around two thou of movement, or 0.06mm. Any more or less and you need a different shim.
Now remove the hub and end of the drive shaft for assembling the spiders.
Fit the lower fulcrum bearings and proceed as per the manual to fit the brake shoes and then the carrier to the lower swing arm.
Newer donor cars have a huge dust plate which looks very ungainly. I used a angle grinder with a 115mm disc to cut a circle and remove the outer part of the dust shield. Dress with a file, paint with few coats of smooth Hammerite of POR 15 if you are feeling flush and haven't spent enough money yet.
The big disk goes in the bin, sorry I mean recycling, the small disk is the backing plate for the handbrake shoes.
A little chemistry lesson. Take a piece of aluminium and a piece of steel. Put them close to each other but separate with water. Salt water is best but rain water will do. What you have now is a very simple battery cell which will produce an electrical current. Which is fab apart from the fact it tends to reduce the aluminium back to it's bauxite origins. And that is why we have the white powdery mush in the 'before' photo above.
Jaguar would have known this, but apparently ignored it when assembling the dust shield to the aluminium carrier. Well now you know, you can do better. So put some insulation between the two surfaces. I'll use the ACF50 spray and a smear of copper grease. The chap or lady you eventually sell this thing to will be most grateful I'm sure.
The fulcrum races are a bit overkill considering the amount of movement there will be, you would think some simple bushing will be adequate.
Anyway, once fitted as per the manual, check the end float.
Clamp the hub on the spacers that sit on the outside and use two flat blade screwdrivers to move the hub back and forth. The measurement should be as near to zero as possible. I recorded 0.0mm on one hub and 0.01 on the other. Of course, the bearings should not be binding either so check they move freely.
Before fitting brake shoes, I wanted to make a small bracket to positively hold the hand brake cable in place. Not strictly necessary as it will stay in place under its own tension but I wanted a better solution here.
Drill or grind out the hole in the carrier to accept the first lip of the metal end piece of the cable. Drill and tap a 5mm hole for the stud.
I made a bracket from some galvanised steel and then painted silver.
Originally I tried to fabricate the little bracket with a step so I would not need an extra nut as an offset but it ended up a mess and this was just easier. By now I am starting to like things that are easier.
Hand brake shoes.
My God this is so last century. Drum brake shoes. I used to have to deal with these back in the seventies. Twin leading shoes were the cutting edge then. Now here we are again, sweating and cursing them into place against the spring tensioners. Fingers jammed until you fumble for the big screwdriver to free yourself. Still, these are from a 94-97 Jag so I suppose we have to put up with it.
Anyroadup, here is the way I found easiest.
First put the top spring and adjuster in place
Put this on the hub carrier and add the lower spring
Now add the expander with the cable attached
Insert the little spring loaded clips that go through the the backplate. Open the shoes with a big flat blade and push the expander into place
Well done if you noticed I have the shoes the wrong way round here. The end with the narrow cutout should be for the expander and the end with the wider cutout is for the adjuster. So I had to redo this but I'm not showing you that as I like to pretend that didn't happen.
We are now ready to mount the whole thing onto the rear suspension and start dealing with camber angles.


